The Project
When it came to designing the booth itself I had a clear outline in my mind for the general shape and size, as it would be simple, and based on the area in which I paint in my room at home. I took into account the need for table space (to put needed items on) and enough floor space for one person and an adjustable, standing easel.
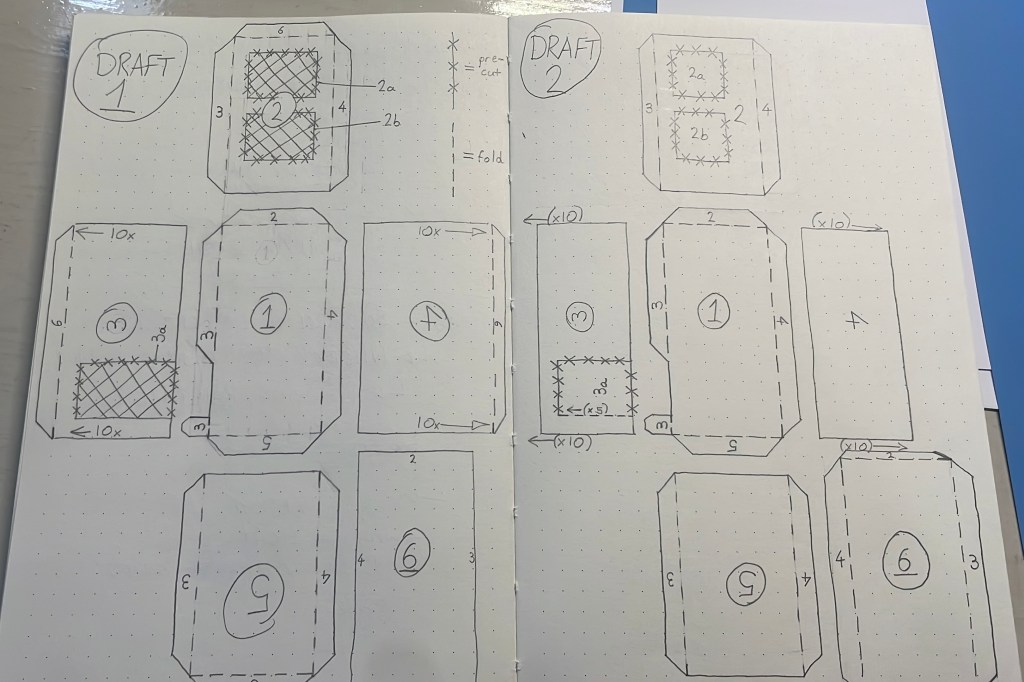
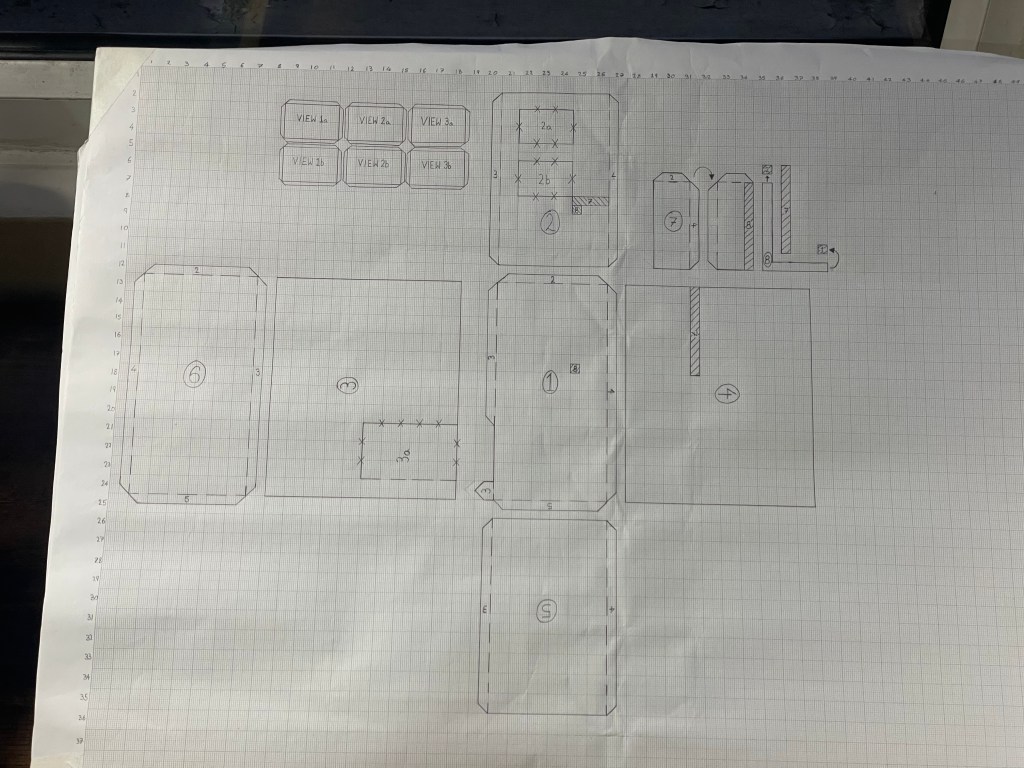
Having already stuck the printed photos of my room into a cardboard box helped me to visualise the necessary pieces to make a complete, closed booth. To create the template design I first of all drew a loose plan in my sketchbook, I then edited the design and what would be included in the kit to build the booth. I drew three draft templates prior to transferring over to Adobe Illustrator in order to create vector shapes that could be easily resized.
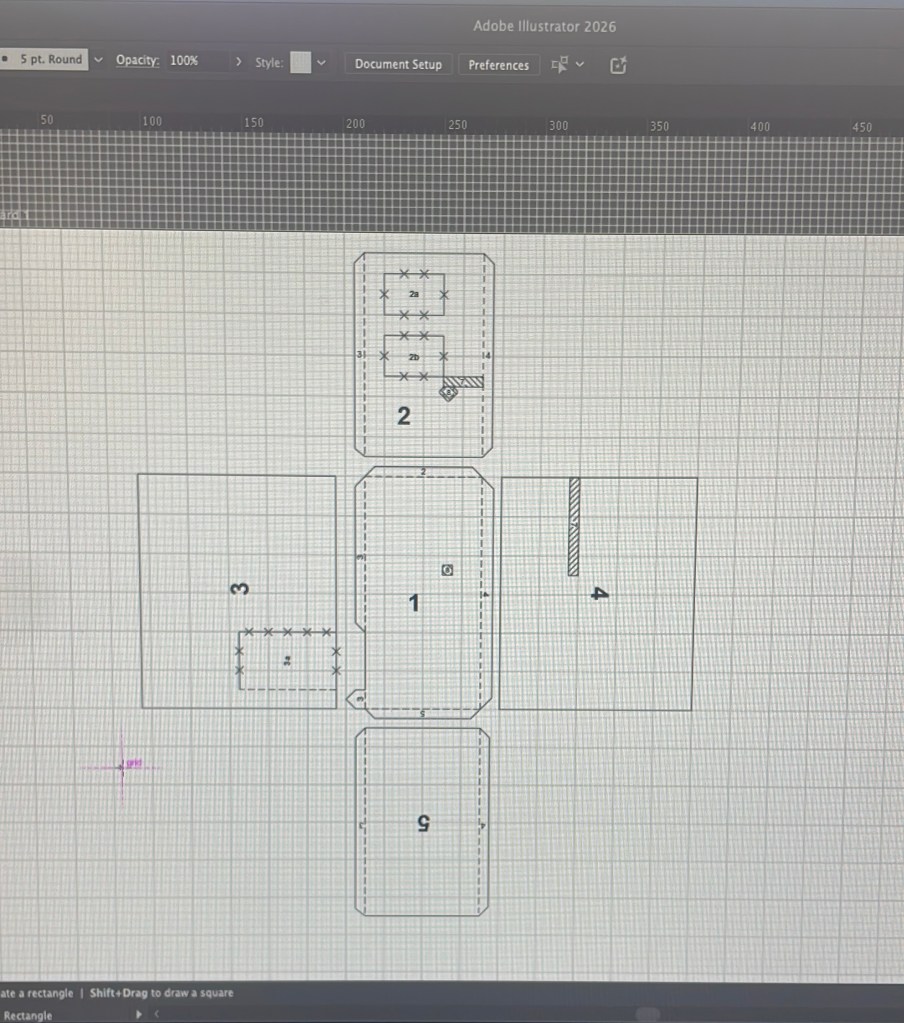
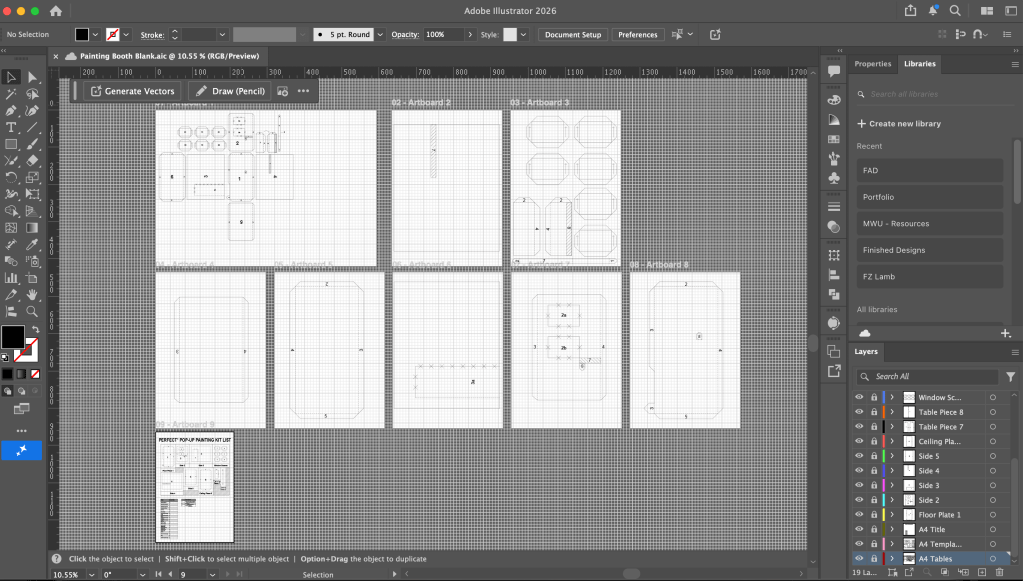
In Adobe Illustrator I set a background 1cm x 1cm grid to work on for precision. I started the measurements simply, making the box to be 6cm x 12cm wide, and 10cm in height, and knowing I could easily scale this up prior to printing. When I had completed making the template sections on Illustrator, I began to write an instructions list on Apple Notes; several times I had to return to previous points and amend them as I visualised how to put a life-sized version of the booth together, single-handed, as the kit would be intended to be built. As I created elements in Illustrator – I ensured I was naming and grouping layers together accordingly, for ease and clarity to my work flow. This made it much easier to select the necessary elements for resizing later down the line.
Seeing the template as I was creating it on my screen was satisfying to my eye; I liked the contrast of sharp, straight, black lines against the white page, as well as the potential for space that the template displayed when laid out flat for display. This inspired me to keep the flat template in the final display of the work by creating a kit list with to-scale diagrams of each piece.
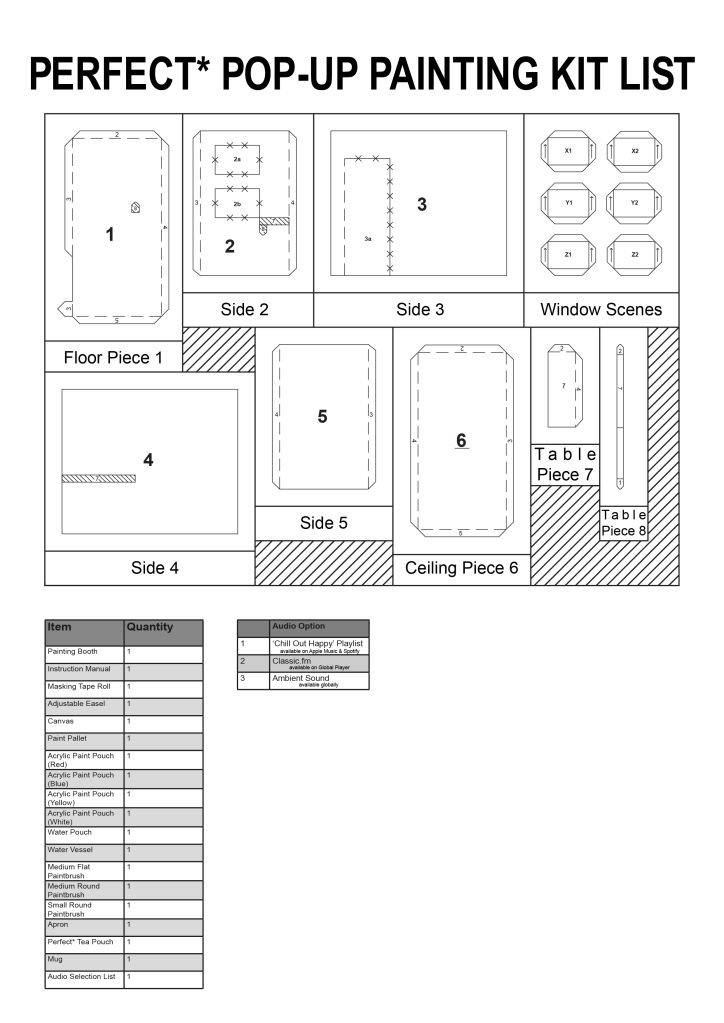
I scaled up and printed the template pieces, as big as they could be individually, on A3 card. I then cut out each piece with a craft knife before arranging them in position on the floor. I really liked the mapping out of the space, and being able to see what I had created begin to take shape as all the pieces aligned together. In the photo I took I also like the background for the pieces being the rug; the contrast between the stark white template pieces and the orange background emphasises the outline of each piece.

Reflection
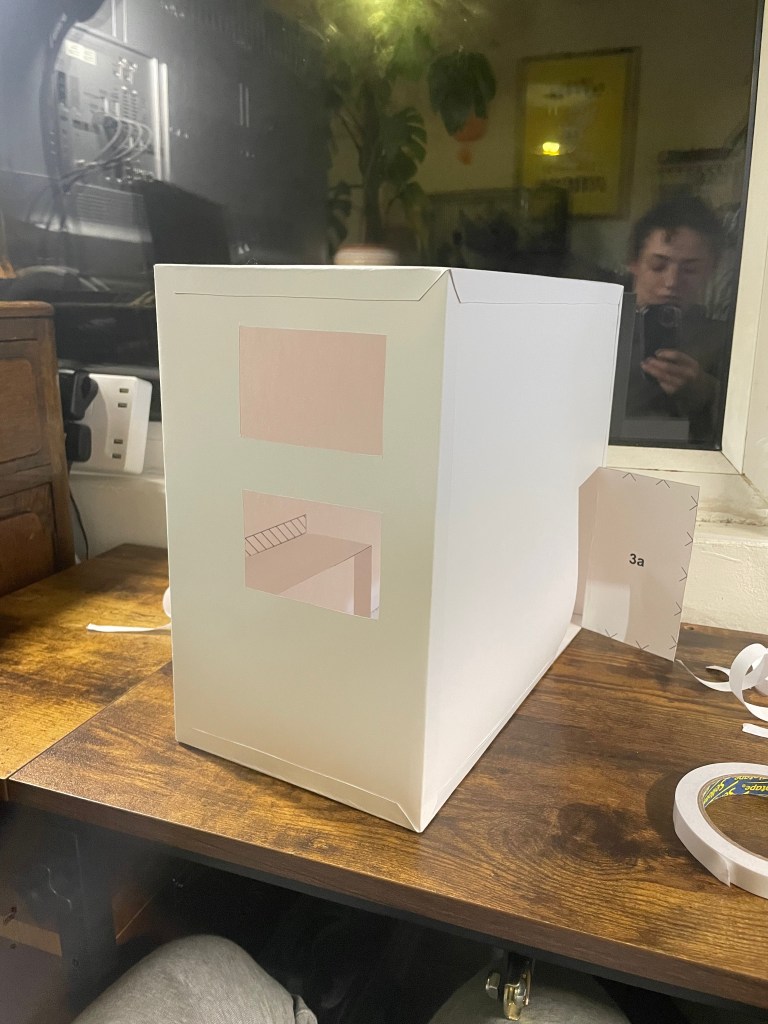
Having now built a small model version of my painting booth has helped me realise some adjustments that would need to be made to the design were it to be made life-sized – for example, the height of the door needs to be adjusted, as well the table alignment tabs. Other than these elements I’m really happy with the materials I used for the design and the scale of the model itself.
Having designed the booth’s template on Adobe Illustrator, I then scaled up the largest piece to fit as large as was possible onto an A3 sheet of Bristol Board. I like working with this type of paper/ card, as it is smooth to the touch, and strong despite being relatively thin / lightweight.
I also have a printer that can print onto Bristol Board, and so I knew it would work for printing a design onto.
I expected I would need to use a Cricut machine, however once I had the template pieces printed, I realised the small job of cutting each piece out would be quicker to do by hand using a craft knife and so this was the method I used. I then used double sided sticky tape to attach the template pieces together as I knew this would hold better than masking tape (as I had referenced in the ‘kit instructions’).
Seeing the booth standing completed was satisfying and sparked more desire to play around with patterns and designs for inside the box.
Despite the satisfaction I feel from having completed the construction of the booth, the physical materialisation of the piece now feels slightly underwhelming; perhaps because of it’s plain white appearance, perhaps because it’s too small to actually use, or because I found the digital designing aspects to be the most rewarding and satisfying tasks throughout the creation of this work. Those steps included – drafting the template drawings (on paper and then Adobe Illustrator), creating the instructions manual in Apple Notes, and then formatting them in Adobe InDesign, as well as resizing the template drawings for printing in Adobe Illustrator again. I did also enjoy the process of putting the booth together, however found most satisfaction in the stages building to this.
My next steps, beyond having now formed the booth physically, albeit small – are to consider ways in which I would like the work presented, and to look into the images that I would like printed on the inside of the booth.
